As some have seen the old Rigify, which I’m very fond of, has seen some important updates, lemme pause right there if you haven’t this is the Tutorial for the old rigify, which is still mostly relevant, and so consider this as “part two” or “advanced rigify” so you learn a bit more of the ins an outs of using the newest version shipping worldwide with blender but the general mechanics of setting up a rig is exactly the same.
The documentation isn’t complete, but I’d say it’s just enough to understand most of it and so thank you to the MAD Entertainment dudes and the Pitchi Poy guys as well, who worked out these big updates and tried to keep everything documented.
Though I’m still missing some features to have a complete professional rig like you’d see at a studio, with things like space switching, or a better facial rig, it’s still my favorite auto-rig in blender, because its super solid and fast to setup and results are pretty good.
In fact I recently used it for a couple small tests like this, note that rigging this character took about 20 mins.
Soooo, lets get to it!
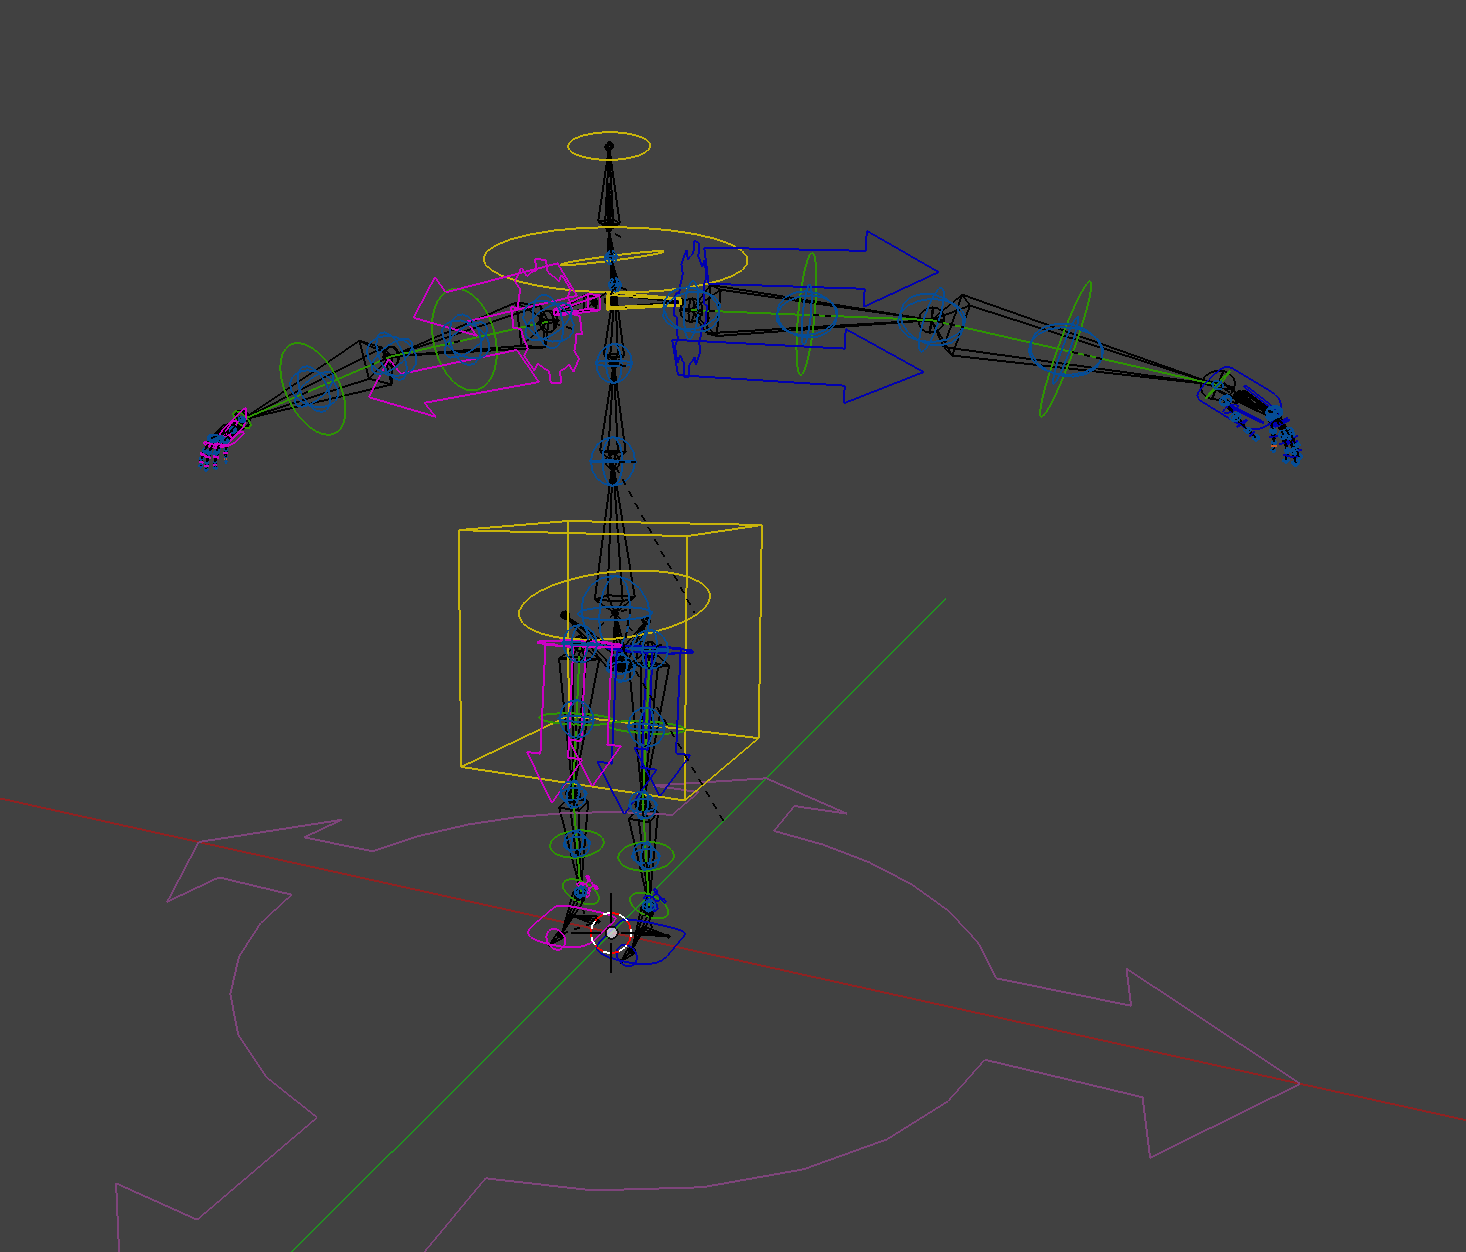
One of the first things that you’ll see out of the box is that now it comes with a few new meta-rigs setups for different kinds of beasts for faster setup beside the Human Meta-Rig:

Which as a bone setup look like this:

Also some of the amazing new features is that it bundles a panel in under the T panels for tools, with not only IK FK snapping, pole to rotation type of knees and elbows, and rotations axis converter bundled, which are all a MUST have:

As I was mentioning before, I’m missing in this panel a pose space switcher to be able to switch spaces to world, root, or whatever other control control you want with a click, and back… I remember Julien Duroure was creating an add-on called AutoRefSpace for this, but given that this rig aims to bring the important stuff out of the box, that should definitely come with.
So as you first setup your rig most of the process is the same, though before you press “generate”, you might want to go into the first bone of each chain and pick a setup of your preference,
This is one of the new things that I didn’t understand but after going through the docs, i finally get, each of the chains will be converted into a modular part of the rig, and so there are types of pieces that you can generate, there are two types of fingers for instance, and also different types of legs, and so on which you can read more in depth about here
In my case I really don’t like the default setup of the finger rigs that comes with new rigify, I like the old one, the one with a little stick for curling, and then rings to tweak each phalange, so I’ll go to every joint of the base of each finger (you can do them all at the same time with right click copy to selected after you’ve done one)

And after you’ve picked that, then you can go and look at the new panels to setup your rig under the Armature options of your metarig:
You’ll see these:
First: and one of the things I started recently understanding and loving, is that you can make rigify, create bone groups for you, and then define which bones go and colors they get beforehand.
Also the “unified select/active colors” is great, now you can really see what’s selected, active and unselected, this bit in blender rigging default setup is very crapy and these guys managed to make it pretty decent and less complicated.

In this panel you tell the autorig how to organize, and name your armature visibility layers, tell it if you want to create a “selection set” for that layer (the little circle), and finally tell it int which bone group it will live (color), it looks weird but it’s rather simple.

Finally you have your usual Generate rig button, but not without some advanced options, like override a rig that you already had built, or just create a new one.

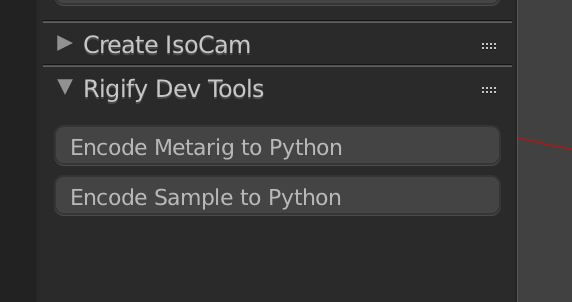
Here is a sample setup with the first one, default coloring, and the second one my own color setup, it took me 5 mins to actually set it up:


And so the last thing feature I feel I’m missing, is the ability of preset your own setups of meta-rigs with your color, layer setup and every so you can just add it and apply the configuration, or just be able to setup your meta-rig and add it to the add menu, so once you found your ideal setup you can just bring it in each time, but really that’s it.
It’s getting really close.
UPDATE (01/06/2018): Oh and as an other thing I would like to see in rigify as an option would be the ability to create double or even triple controllers for at least the root, hands, head, torso, chest, hips. Given that blender doesn’t have animation layers (and it isn’t likely to have them any soon), and the NLA workflow for this is retarded, a good fix that is very common is to have multiple sub controllers, also eases the work to avoid gimbal locks.

I gues making a preset addon wont be that hard. SImply make a new panel and look at all the inputs, than write these to a json file orso. Than you can simply use a drop-down menu to set all the menu’s
LikeLike
I have just rigify a couple times, so im no hardly anything about it. Yet i see some weird stuff in that color add panel. First when you need to apply it you dont see the color previews like when you edit the group when rig is build.
Another thing is see is that you cant apply a theme but only add a new set. I would like or think it was better if you can apply you theme to an existing one. Just like when want to edit them.
Also the unifief option is weird, i would expect when its off it should only apply the color set to the selected one and not the all the groups.
Perhaps i can have a look and see what i can do with this.
LikeLike
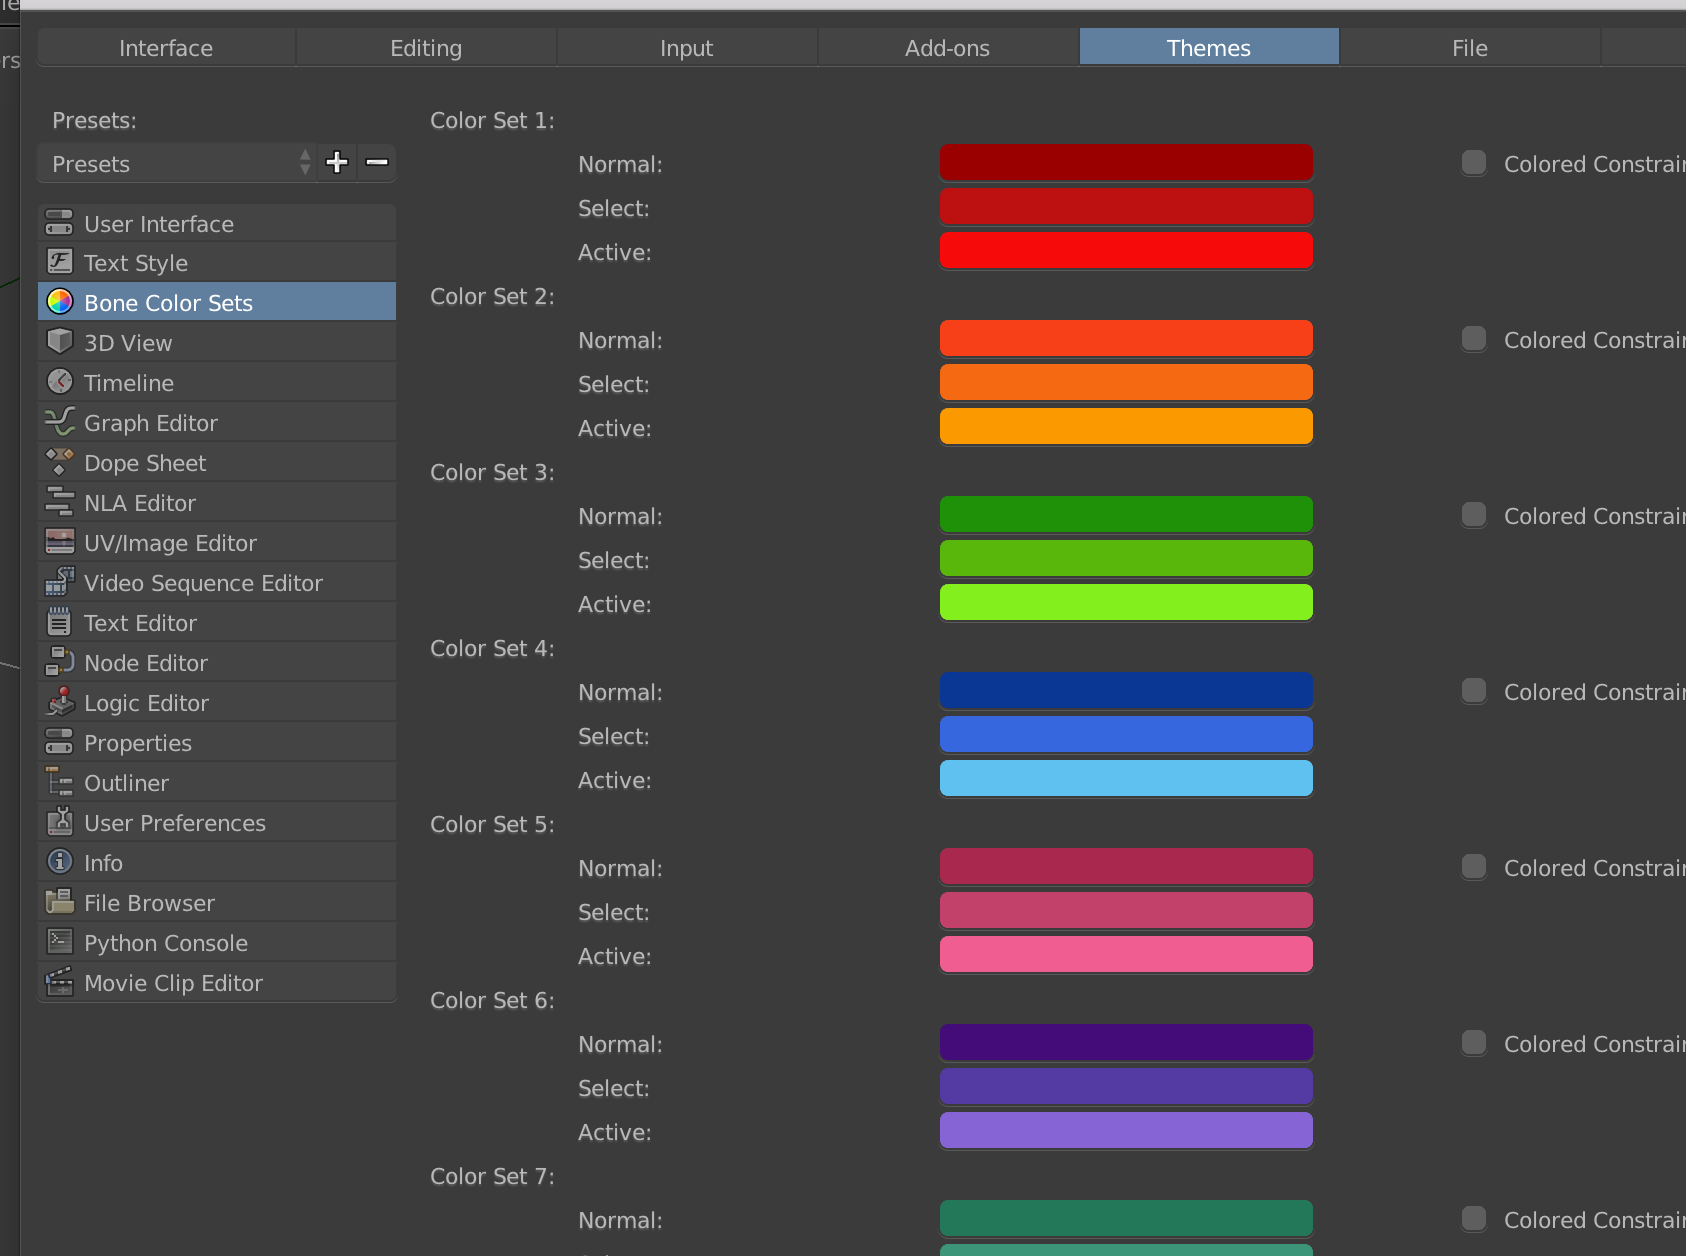
I was checking the bone group color settings and noticed they showed a nice icon showing the colors. After some fiddling i found the code. So now its easier to see what the sets are. PS why dont you add your own set to the Theme settings under Preferences > Theme > Bone Color Sets. If you add your own set to the custom presets, than you can add it each time.
Ill try to see if i can add some more, perhaps a menu with custom colors as you wanted.
LikeLike
to my concern it should be easier than that, you should only need to pick the color that it is when it is not selected, that’s It, and then the active color and selected color should be unified with the rest of blender.
LikeLike
Okay that can be done. But i think they have a reason for the select and active color? Anyways, you can easily make a custom bone color set.
I did like this setup because it shows the colors in small icons form
LikeLike
PS in the sets, number 16 / 20 are the custom ones. The others ones can also be set.
Its in preferences > theme > Bone Color Sets
LikeLike
Hey i hacked something together now. Its not as working as i want at the moment but it does store all bone groups, with there colors and you can make sets if you want.
LikeLiked by 1 person
Here’s a quick preview, for now it only works if you have the same amount of groups as the standard. Im trying to figure out how i can make more or less groups also work
LikeLiked by 1 person
wow dude, youre a master!!
LikeLike
Okay after reading the article again, you would like to be able to save everything into a single preset…. oeffff thats a bit more hustling actually. Everything is divided over multiple panels. Would be nice.
I looked into the sapling tree addon. But this saves all settings in a bit different way. Not sure im capable of doing such a thing.
LikeLike
Okay, its not that hard actually. I simply need to collect all inputs. Its only the bone color groups which is still wicked to solve.
I can collect all settings, but you need to add the correct amount of groups prior for using the preset. Than i think it will work as you wish.
Do you have perhasp a simple model/armature i can test?
put the link in a response or email me romboutv [@] gmail.com
LikeLike
The most simple thing you can actually do is make template. SImply set the rig up how you want and save that. Than when you need it simply append it.
Perhaps i can add something so we can save different models as custom presets in the addon folder. I got the other part almost completely working. I had not thought of the bone rigs setups yet. I think the only way is doing template files.
Or perhaps some other users has an better idea. Ill try to make that template part work
LikeLike
PS there some addon for additive and other options in the NLA editor. You can layer animation then. https://blenderartists.org/t/nla-additive-animation-layers-add-subtract-multiply/1100149
LikeLike
Whaaa i feel like an idiot! I finally made some hack possible where you could save a blend file with the metarig and also add a menu to append this rig back into blender.
I went on searching for creating metarigs….. tada… now comes the idiote part!
It seems this function you need is already build in. When you create a metarig and your done. Go into edit mode. There will be a Rigify Dev Tool panel and when you hit that encode button it creates a py file in the text tool panel.
When you save this file to the metarigs folder your done. Now you can add your rig right from the start and need to hustle with my dirty workaround.
However, my save rigify settings preset is perhaps still handy i think. you can change all items and make preset for that, in case you want to change when you already got a metarig in the scene
I made a new folder, dropped the generated .py in there and it automatically creates a sub menu in the main Add menu
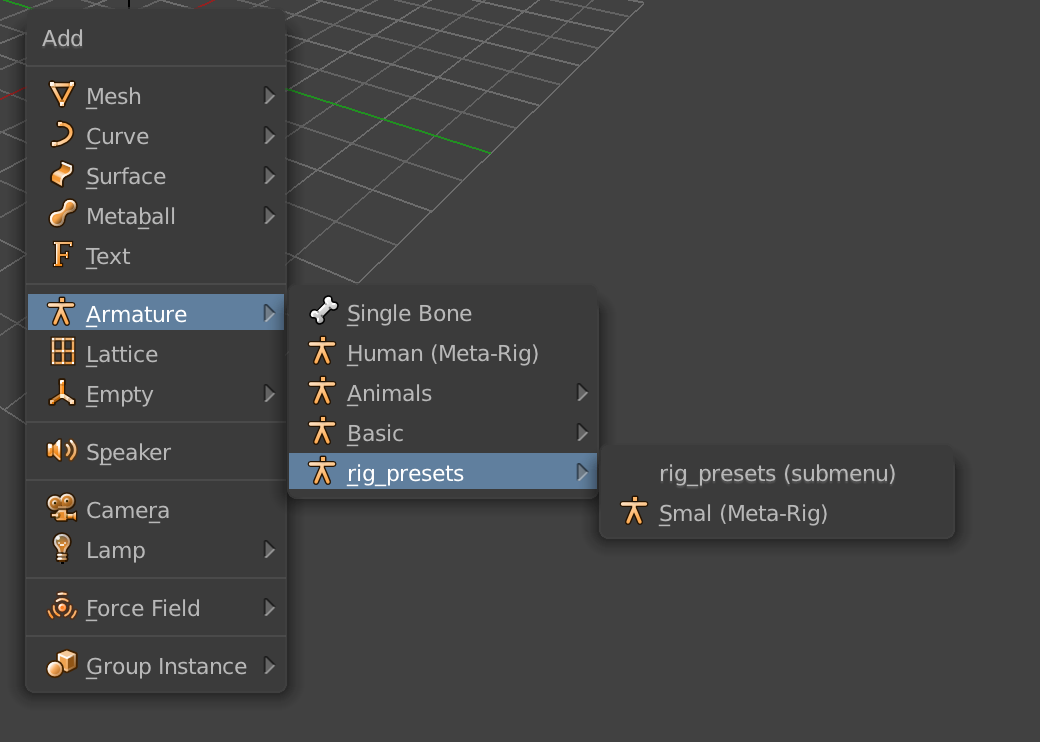
Ive added a quick example, this is how it generates it now
LikeLike
That’s fantastic!!!!, now we just need to be able to create our own rig types, so we can create a better facial rig and have it as a part of rigify!
LikeLike
You want to look for this panel, its in the tools panel
LikeLike
niiice, i had seen those panels before but never new what they where for!, sweet!
LikeLike
Let me know if you would like that other option as well. Not sure its still useful after i found those 2 buttons which actually does save a preset.
Wonder why its sort of hidden. They could easily make this work much better by showing these buttons on object mode as well. Than let the operator go into edit mode and than even save the file to the proper preset folder.
I think im gonna do a hack and add these buttons to the advanced options. Seems more logical than its current position
LikeLike
thank you for taking all the time to research!
LikeLike
Okay i think this is it. Im not sure about the button location. Perhaps i should go into advanced settings. But i think this preset also need to be visible when your in edit mode.
I do need to add perhaps on more option, that is to add folders as well. Now it only adds them to folders chosen from the dropdown.
Ive tested this and it works. The only downside is that you need to restart blender or reload addons using F8. I cant update the add menu other wise. But i guess this already helps so much more
LikeLike
Okay i got it working properly now. I just hope this works on windows, because i used forward slashes. Im not sure if python on windows uses the same. Otherwise i need to make an exception for that.
Here’s a quick preview, you can add preset by adding a name. I also added option to overwrite existing ones and it does check if the same name has been given. For now you need to use only lowercase and cant use weird other characters. I need to add that part i think.
You can also add new preset folders if you like.
I will clean the code and make a repo for this one on github
LikeLike
Hi man, i made a quick repo here so you can test it if you want. let me know if it works on your system. I hope your using Windows so im sure i works there as well. Here’s the link, https://github.com/schroef/rigify
LikeLike
I´ll test it out!
LikeLike
Sorry me again… i changed the add. I made it a separate addon so it looks cleaner in the preferences panel with no errors for double addons. Perhaps easier to maintain as well
https://github.com/schroef/Rigify-Save-Presets
LikeLike
No worries, thats great
LikeLike
Did you try it already? Curious if it works. I also put it on BlenderArtist, but i got the feeling not people use. Never got any response… sort of feels like wasted time. For now than… i need to start learning rigging more 🙂
LikeLike
No, i haven’t really had any time, I have 10 posts pending to finish, a lot of work a trip to chile, moving countries for new work, and all. so havent really had any time what so ever!, sorry mate.
whatever help you need on that lemme know!
LikeLike
Ahh okay moving back thus, thats always tons of work. Especially emigrating and such.
I was just curious if this is what you need. I have not received any feedback yet, not from BlenderArtist as well.
Well, when i finally go further with modeling characters and rigs, i got this tool in advance 😉
LikeLike
did you try creating your own rig types? >> not metarigs but parts.
LikeLike
It doesnt seem to work with Windows. I can install it but the button doesnt show up. I get the usual ‘upgrate to 2.8x required’ but i dont think thats the problem.
LikeLike
well all of what i wrote about it was in 2.79 time, so maybe in 2.8 its not really completely working yet.
LikeLike
How is the correct workflow for adding extra bones for a hair rig? I’d like to create a very detailed (lots of hair strands) rig system, but I’d like to add it to the riggify metarig, so it will get generated in one single armature.
Problem is that the extra hair bones get sent to another hidden layer, and when I parent that to the mesh, the extra vertex groups (weights) don’t get added to the list of vertex groups from riggify. How do I correctly add more than 24 new bones for hair rig into riggify and generate weights (vertx groups listing?) Thanks.
LikeLike
hey Pablo!, basically you are missing one step, you need to tell your bone what you want it to be:
because the bones in the metarig are the “setup” for what it will become in the rig, for this to work out you need to select your bones in the metarig in posemode, and under the bone properties > rigify type input a type of the ones predefined for you, some type you have to add to every bone even if they are in the same chain, others you just add in the first bone of a chain and it will convert this chain to something. In the case of an fk kind of hair you can select the first of the chain of hair and pick the type “basic.copy_chain” go to the armature press the “generate rig” button and see the result, i think from there you should get the idea
LikeLiked by 1 person
Hi. Why Pablo? haha. Not my name. It´s Pierre.
All right, so I create the bone, attach it to the metarig (or duplicate it from any other close bone in the metarig), switch to POSE mode and go to the bone property type Bone, and select what kind of chain it will be from the presets. Yeah, it´s basically hair, so I hope basic.copy_chain will do. When I generate the rig all of those chains get sent to a far hidden layer. Why don´t they appear on layer 1? Also, they don´t have controls and come locked in quaternion mode.
LikeLike
ah haha in my head you where pablo schillier but you’re right ! sorry my bad!
LikeLike
yes that chain gets sent to the last layer, and the controllers made for it should be created at one other layer (dont know which one exactly but be ready for animation), lemme double check
LikeLike
I was looking to see if you can make Rigify’s Chest control IK (switch its world space coordinates from torso to Root or none) but found this conversation you guys have been having ! This is awesome, I will definitely be using presets. Thanks at Luciano as always for the useful info and Schroef for the addon !
LikeLike